API Explorer
In addition to the REST API reference on this site, BloodHound provides an API Explorer that provides interactive API documentation and testing capabilities. The API Explorer is built using Swagger UI and is accessible from within your tenant after logging in. It allows you to browse available API endpoints, view request and response schemas, and make test API calls directly from the interface.Authentication
The BloodHound API accepts two forms of authentication:- A JSON Web Token (JWT) is generated during login using your email address, password, and 2FA token (or through a SAML- or OIDC-based authentication flow). JWTs remain active for 8 hours and are primarily used for end-user access to the web application.
- An API token and token ID pair is generated in the Administration interface. API tokens are primarily used for integrations and automation.
- Non-personal API tokens and token IDs for integrations, such as Splunk, ServiceNow, and Cortex XSOAR
- Personal API tokens and token IDs for individual day-to-day use, such as BloodHound Operator
API key expiration
BloodHound Enterprise supports API key expiration to help you align with internal security and compliance requirements. This setting controls how long API tokens remain valid.You must manually create replacement tokens and update all dependent integration configurations before they expire. BloodHound does not automatically rotate API keys.
Non-personal API tokens
Administrators can create dedicated, non-personal BloodHound accounts for API integrations. These accounts are not tied to a specific person and are intended for applications and services that need to interact with the BloodHound API. When you create a non-personal API token and token ID for one of these accounts, the roles and permissions assigned to that account determine its API access. To create a non-personal API token and token ID:Create a new user account
- Log in as a user with the Administrator role.
- In the left menu, click Administration > Manage Users.
- Click Create User and enter the required information.
-
After creating the user, you may optionally log in as that user to enable MFA.
MFA is not required for API key authentication, but it can provide an additional layer of security for the account.If you choose to enable MFA, securely dispose of the password and MFA configuration after setup, as they are not needed for authenticating with API keys and can be reset by an Administrator if necessary.
Generate an API token
- Log back in as an Administrator (if not already logged in).
- In the left menu, click Administration > Manage Users.
-
Find the user account you just created, click the hamburger menu, and select Generate / Revoke API Tokens.
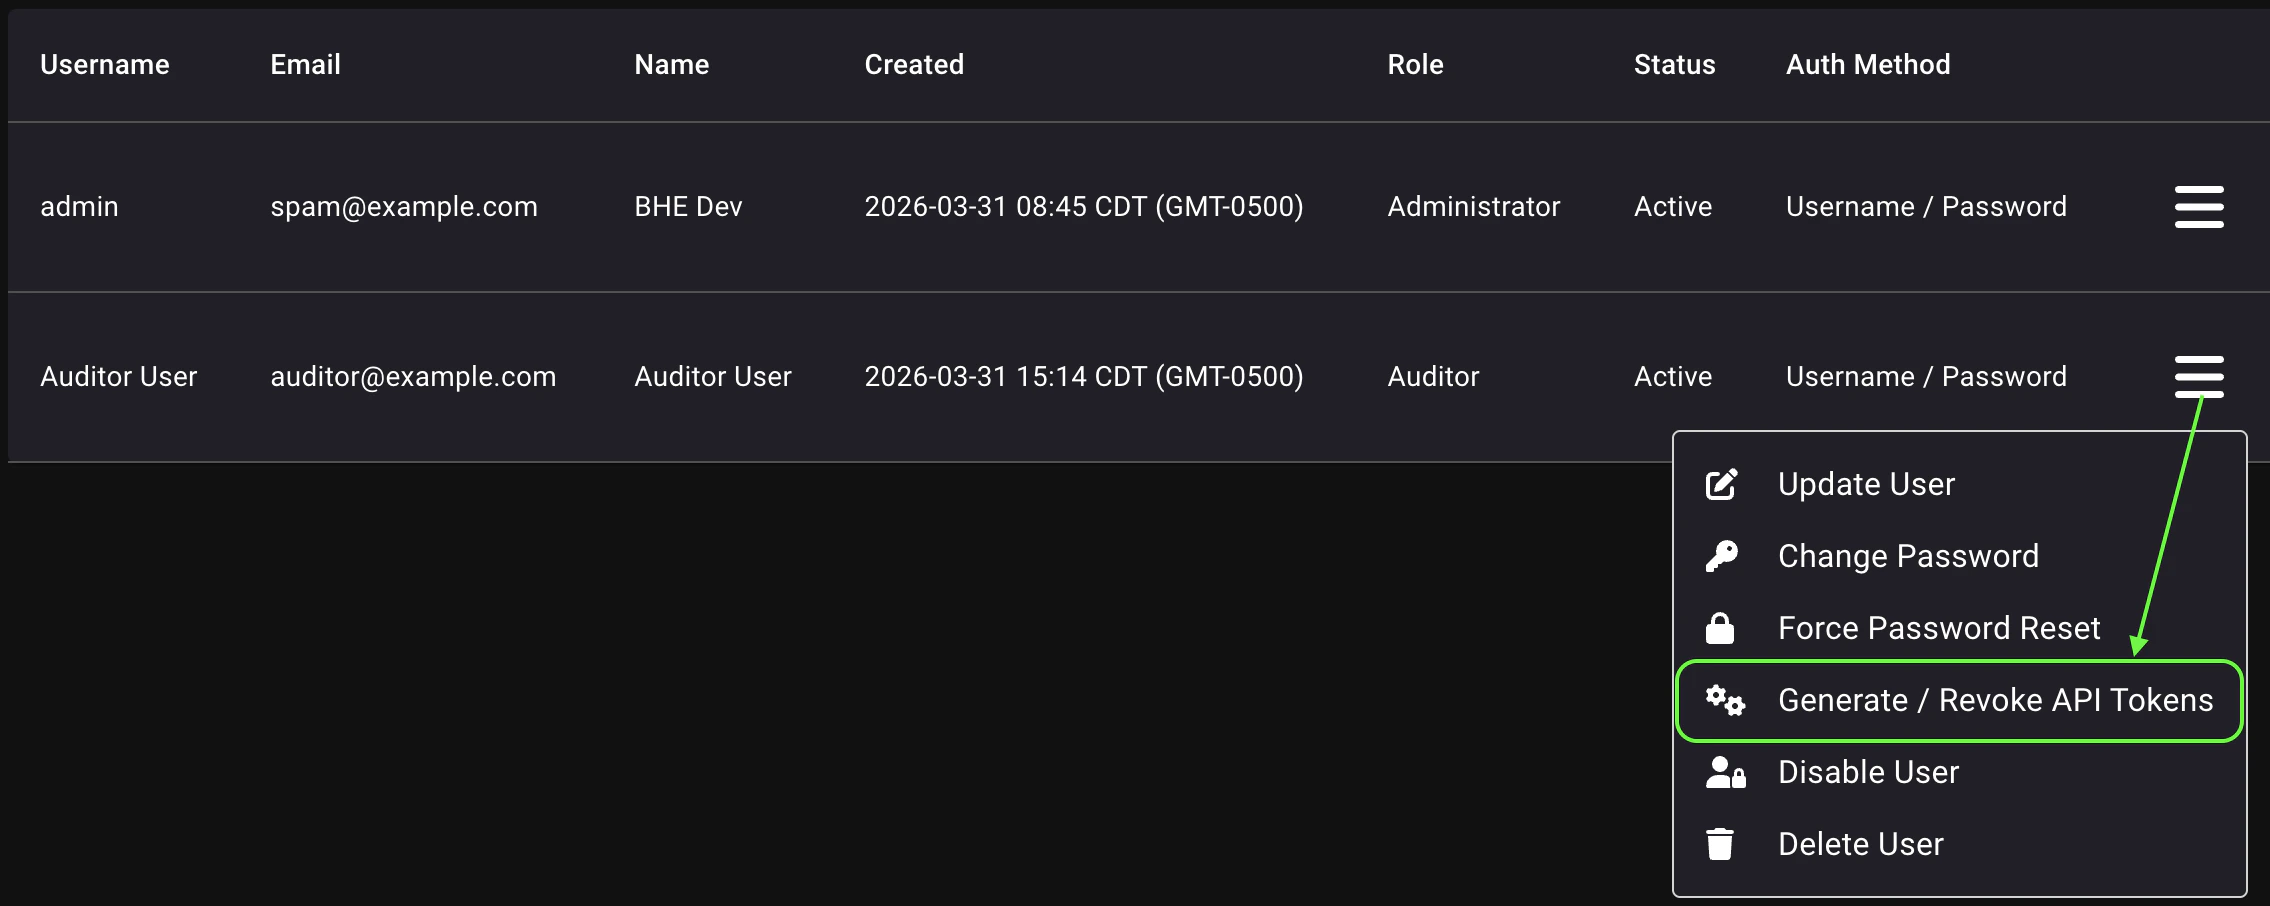
- Click Create Token, give it a descriptive name, and click Save.
-
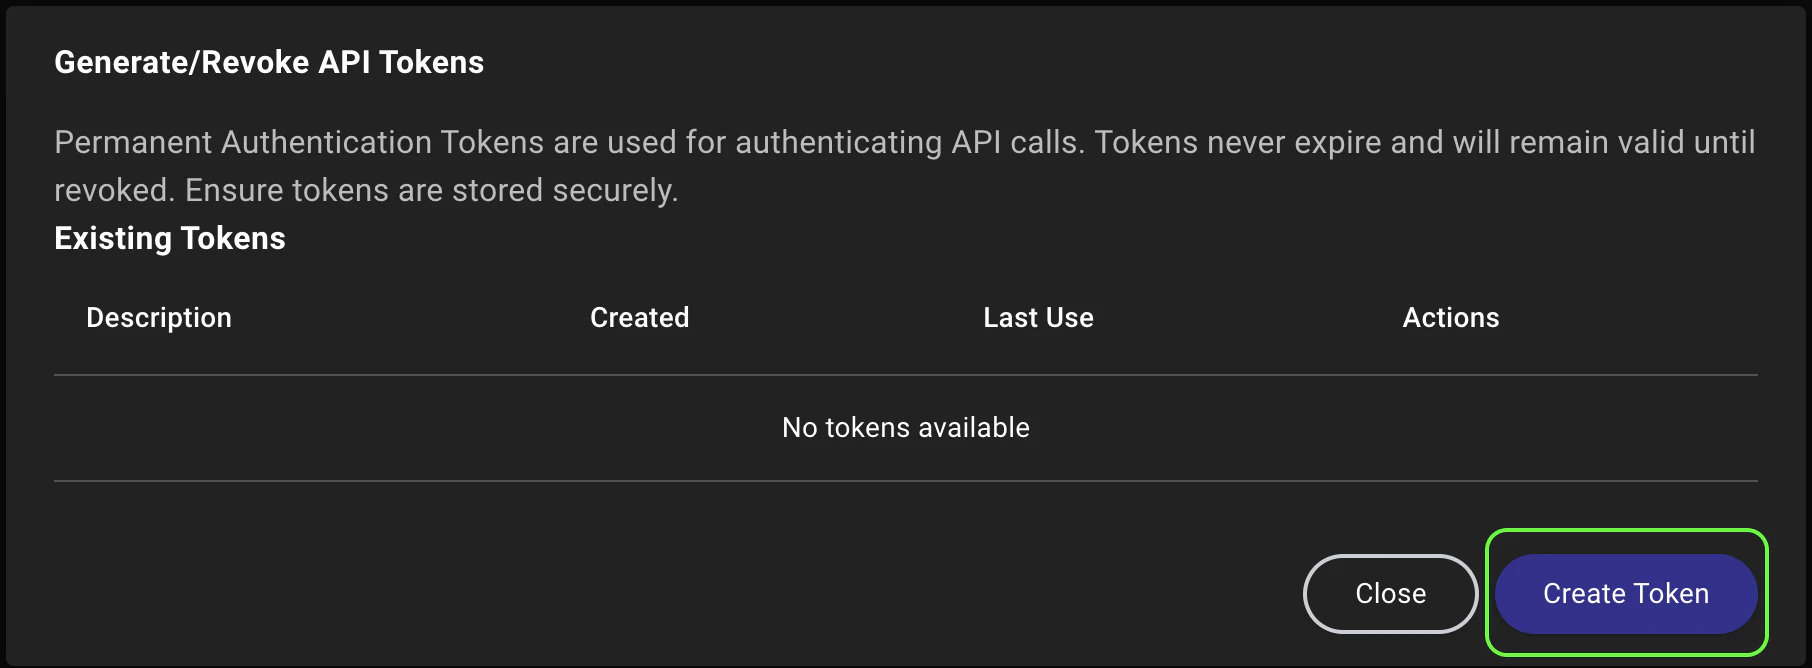
Save the API token and token ID and click Close.
Both values are required for authentication and will only be shown once. If you lose them, you must generate new credentials. You should also revoke the previous token to prevent unauthorized access.
- Configure the dependent integration with the new API token and token ID.
Personal API tokens
You can create personal API tokens and token IDs for your own use, such as for testing API calls. Personal API tokens are tied to your user account and inherit the permissions of that account. To create a personal API token and token ID:Navigate to API Key Management
- Log in to your BloodHound tenant.
- In the left menu, click My Profile.
- Click API Key Management.
Generate an API token
-
Click Create Token.
- Give the token a descriptive name and click Save.
-
Save the API token and token ID and click Close.
Both values are required for authentication and will only be shown once. If you lose them, you must generate new credentials. You should also revoke the previous token to prevent unauthorized access.
- Use the API token and token ID to call the API.
Call the API
After you have an API token and token ID, you can call the BloodHound API.Use a JWT/bearer token
For quick tests or one-time calls, the JWT used by your browser may be the simplest route. The API accepts calls using the following header structure in the HTTP request:Use an API token
For long-running API integrations, BloodHound’s API uses hash-based message authentication code (HMAC) authentication. The API token is used as the secret key to sign requests, and the token ID is sent as the identifier. Calls against the API must include the following in the signed hash:- API token
- HTTP method and URI
- Current time
- Body content (if applicable to the request)
apiclient.py in the specterops/bloodhound-docs GitHub repository. The following code snippet from the apiclient.py script illustrates the authentication process: